

How to properly use an EMF meter

What are EMF Meters
How to read on the EMF reader Screen
Your EMF meter might display average and peak (highest) values, like the TF2, where the large number indicates AVERAGE, while the small PEAK number remains briefly on the screen before coming back down.
When considering potential risk to the body, the highest peak readings indicate higher magnetic intensity, which is problematic in the long term. Knowing that sudden movements with the meter can cause false readings, always wait a few seconds for the numbers to settle.
Key Functions on an EMF Meter Screen:
Readings: EMF meters measure electromagnetic fields in multiple directions by showing readings for the X, Y, and Z axes. Many models also display an aggregated reading of the magnetic field.
Warning Indicator: This indicator categorizes the field strength as “Good,” “Normal,” or “Warning” based on safety thresholds for EMF exposure.
Hold Function: The hold function is useful for freezing the current reading on the screen, allowing for closer examination or recording of the value.
Unit Switch: Many meters allow switching between microtesla (μT) and milliGauss (mG) units, depending on your preference or region.
Mute and Backlight Switch: Some models feature mute options for sound alerts and a backlight switch to illuminate the display in low-light conditions.
Auto-Off: The auto-off feature saves battery by turning off the device after a set time if it’s inactive.
Electric Field Readings Tips:
- Electric fields are attracted to the body, so readings might be higher when you hold the meter compared to placing it on a surface.
- For more accurate readings without holding the meter, place it on a surface, step away, and lower your body to minimize interference.
Tips for Accurate EMF Measurements with an EMF Meter
- Positioning: Hold the meter at arm’s length and direct the front toward the EMF source.
- Stability: Keep the meter steady to avoid fluctuating readings.
- Multiple Measurements: Take measurements in various spots around the area for a comprehensive assessment.
- Avoid Rapid Movement: Moving the sensor quickly can lead to inaccurate readings, so allow it time to stabilize.
 IMPORTANT
While we are testing EMF radiation in many parts of the home, it is easy for some people to start worrying, which is not always warranted, provided they do not spend long periods in those areas.
The human body rests and restores predominantly during sleep, a key regenerative time that makes bedrooms the most important areas to reduce the effects of radiation.

Types of EMF meters
- Electric Field Meters: These meters measure the strength of electric fields created by electrical wiring and devices in your home.
- Magnetic Field Meters: These are used to measure magnetic fields often associated with power lines, electrical appliances, and wiring.
- RF Meters: Radio frequency meters measure radiofrequency radiation from devices like WiFi routers, cell phones, and Bluetooth devices.
Choosing the right type of EMF meter for your needs is the first step in accurately assessing your exposure.
The recommended model for your EMF meter
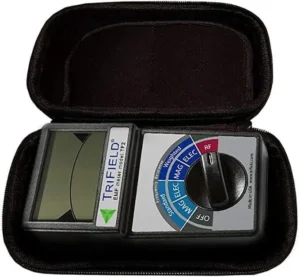
While there are various amateur meters on the market, the Trifield TF2 stands out due to its excellent display, easy operation, and robust casing. Some other features are:
- AC magnetic 3-axis sensor, allowing for more accurate readings regardless of meter orientation
- Audio Indicator (you can activate or deactivate) ,which emits sounds useful in pinpointing EMF sources
- Peak Hold value displayed, showing the highest exposure levels in the last few seconds
- Battery qualification, Operates for more than 20 hours on a 9V battery
Step-by-Step Guide to Using an EMF Meter
1. Understand Your EMF Meter’s Settings
Most amateur EMF meters come with multiple settings for measuring different types of EMF radiation. Take some time to familiarize yourself with the various options on your meter. This may include adjusting the measurement range, selecting between electric, magnetic, or RF modes, and understanding the units of measurement (e.g., milliGauss for magnetic fields or volts per meter for electric fields).
- Magnetic Field Measurement: Typically measured in milliGauss (mG) or microtesla (µT)
- Electric Field Measurement: Usually measured in volts per meter (V/m).
- RF Measurement: Measured in microwatts per square meter (µW/m²) or milliwatts per square centimetre (mW/cm²).
2. Determine the Areas to Measure
Start by determining which areas of your home or office you want to assess for EMF radiation. Common areas to test include:
- Bedrooms: Since this is where you spend significant time resting, measuring EMF levels in your bedroom is crucial. Look for sources such as electric clocks, WiFi routers, and smart devices.
- Living Room: Check electronic entertainment systems, televisions, and nearby power lines.
- Office: Many office environments have numerous electronic devices, including computers, printers, and WiFi routers, which contribute to EMF exposure.
3. Take Measurements in Different Locations
To get an accurate picture of EMF levels, move the EMF meter around each area you are testing. Keep the following tips in mind:
- Distance Matters: Hold the meter close to the suspected source of radiation and gradually move away to determine how quickly the radiation level decreases.
- Height Variations: Measure EMF levels at different heights, especially if you have children, as their exposure levels might differ based on their height.
- Multiple Readings: Take multiple readings in each location to account for fluctuations in EMF emissions.
Your meter might display average and peak (highest) values, like the TF2, where the large number on display indicates AVERAGE, while the small PEAK number remains briefly on the screen before coming back down. When considering potential risk to the body, the highest peak readings indicate higher magnetic intensity which is problematic in the long term. Knowing that sudden movements with the meter can cause false readings, always wait for a few seconds for the numbers to settle.
4. Record the Readings of the EMF Meter
Keep a notebook or digital document to record your findings, including the location, time, and type of reading (electric, magnetic, or RF). This record will help you identify patterns and high-exposure areas in your home or workplace.
5. Interpret the Results on the EMF Meter
Understanding what your readings mean is key to taking action. Here are some general guidelines for interpreting EMF levels:
- Magnetic Fields: Levels below 1 milliGauss are generally considered safe. Levels above 4 milliGauss have been associated with an increased risk of health issues.
- Electric Fields: Levels below 1 V/m are considered low, while anything above 10 V/m may warrant reducing exposure.
- RF Radiation: Safe levels are generally considered below 10 µW/m² for prolonged exposure. Higher readings may indicate a need to reduce exposure by limiting device use or increasing distance from sources.
Areas to check with EMF reader
- WiFi Routers: These emit RF radiation continuously. Measure around your router to determine if you need to relocate it or turn it off when not in use.
- Cell Phones: Measure the radiation from your phone when making calls, especially if you hold it close to your head.
- Smart Meters: Measure the area around a smart meter to see if additional shielding or relocation might be necessary.
- Electrical Appliances: Measure kitchen appliances like microwaves and refrigerators, as these can emit both electric and magnetic fields when in use.
Reducing Exposure Based on Your Findings
Once you have measured EMF levels in your home, you can take steps to reduce exposure in high-radiation areas. For more details on effective methods, visit our Reducing EMF Exposure blog.